AccentuSoftSoftware that keeps you safe.2024-07-05T07:49:53Zhttps://accentusoft.com/feed/atom/WordPresshttps://accentusoft.com/wp-content/uploads/2021/10/cropped-Twitter-Profile-Image-01-32x32.pngAccentuSofthttps://accentusoft.com<![CDATA[LinkScope 1.6.0: Horizon]]>https://accentusoft.com/?p=14862023-10-26T16:22:39Z2023-10-26T16:11:50ZGreetings investigators! LinkScope version 1.6.0 is now publicly available! Download the installer for the software from the ‘Downloads’ page. A lot went into this release, from bug fixes and subtle improvements to workflows to the re-architecting of certain parts of the software. The application is now considerably lighter, and distributing your own modules is easier […]
LinkScope version 1.6.0 is now publicly available! Download the installer for the software from the ‘Downloads’ page.
A lot went into this release, from bug fixes and subtle improvements to workflows to the re-architecting of certain parts of the software. The application is now considerably lighter, and distributing your own modules is easier than ever!
If you haven’t yet, make sure to check out the Module Packs GitHub repository to see how to create your own modules and module packs. In brief, you can now add both local and remote sources to get modules and module packs from. Everything is synced on startup, and all the requirements are automatically managed by the software and the author of the modules. You no longer have to download and set up everything (unless you want to, of course). All the usual warnings apply, when it comes to interacting with other people’s code: Do not add untrusted sources, do not install module packs from untrusted sources, and do not load or run modules from untrusted third parties.
The software also automatically checks the public LinkScope Client repository for updates. For clients that have different requirements, this can be disabled or changed to check alternate sources. Automatic updates lets us ensure that users are running the latest and greatest version of the software, without having to use the updater to re-install. Updating requires administrator / root permissions on the system.
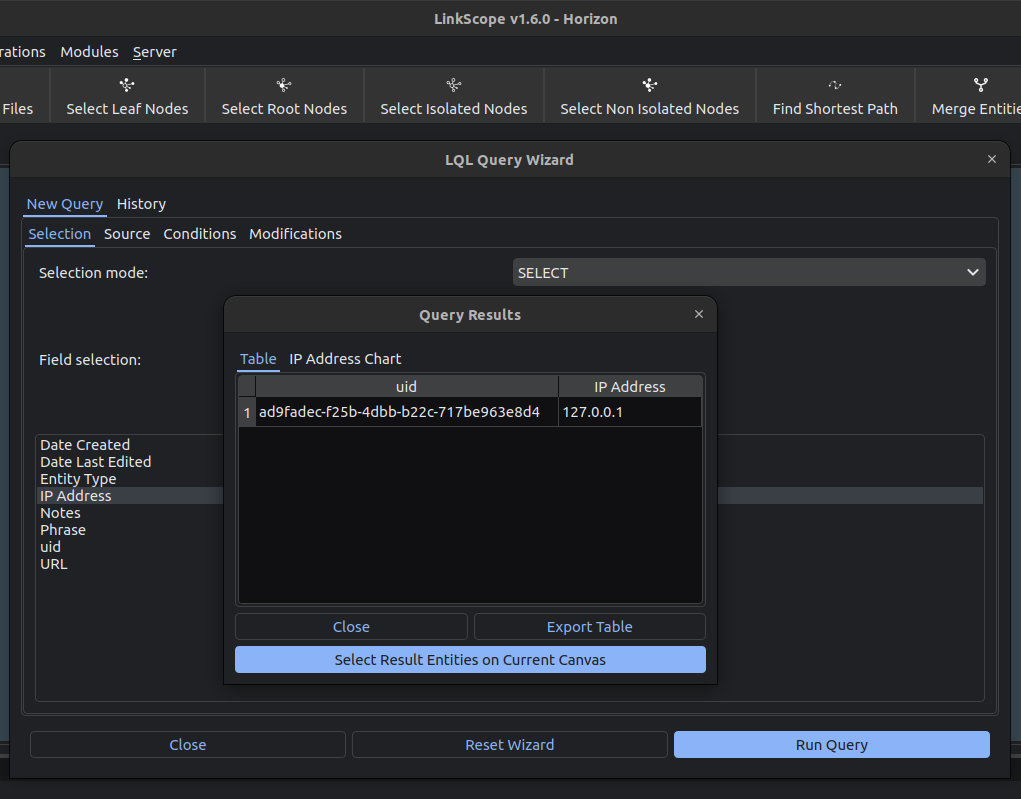
There are also a lot of improvements under the hood that you may or may not notice, such as improvements to how LQL queries work (including, as mentioned, being able to select the query results on the current canvas), the option to open the project’s files directory from within the software, and quite a bit of bug squashing. You can see the full details on our Github page.
Please note that this version of LinkScope is not immediately compatible with projects made with previous versions.
]]>AccentuSofthttps://accentusoft.com<![CDATA[LinkScope 1.5.0: Bannerlord]]>https://accentusoft.com/?p=13462023-02-08T20:58:47Z2023-02-08T20:55:01ZGreetings investigators! LinkScope version 1.5.0 was just released! Download the installer for the software from the ‘Downloads’ page. Front and center in this release is a UI overhaul, to make the software look and feel better to use. The layouts are the same, but the colors and shapes of the elements have been adjusted. Let […]
]]>Greetings investigators! LinkScope version 1.5.0 was just released! Download the installer for the software from the ‘Downloads’ page.
Front and center in this release is a UI overhaul, to make the software look and feel better to use. The layouts are the same, but the colors and shapes of the elements have been adjusted. Let us know what you think of the changes! Interfaces can be hard to get right, so we would appreciate any and all feedback. The new theme works especially well with Dark Operating System themes, but we will in the future allow users to toggle between light and dark themes to suit their preferences.
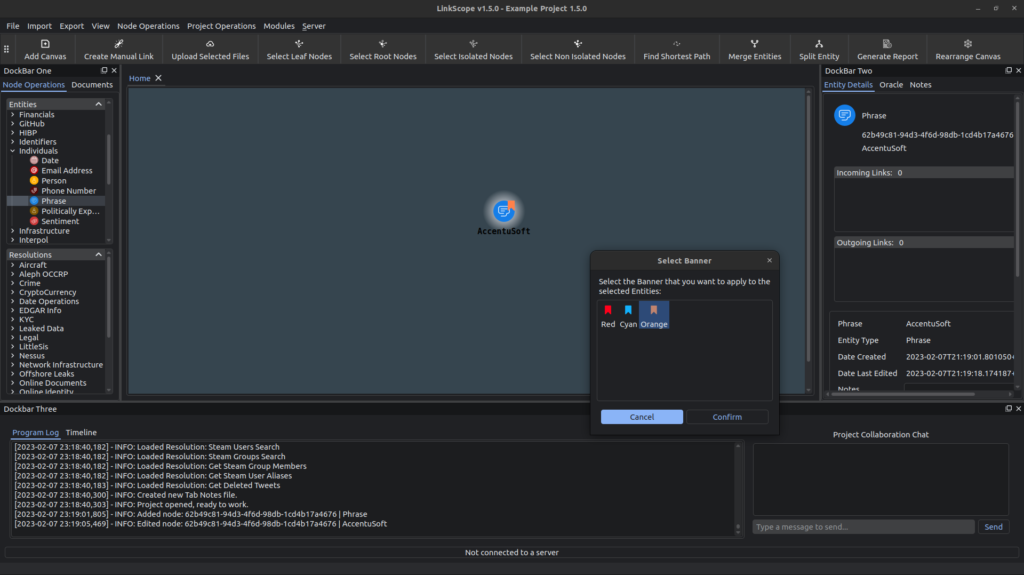
The other big part of the update is the addition of Banners. The Canvas right-click menu now has an additional option titled ‘Banners…’. The sub-menus allow the user to set a colored banner for the nodes currently selected, or clear the banners already assigned.
Tag all the things! Or just the important ones, we don’t judge.
We have included three banners in this release, but will look to add more in the future, and add more ways of interacting with them. For any user that wants to add their own banners, you can do so by adding SVGs in the Icons folder under Resources. The images have to be named “Banner_[name].svg”, where [name] is the name you want to have for the banner. The ideal size for a banner is a width and height of 37.
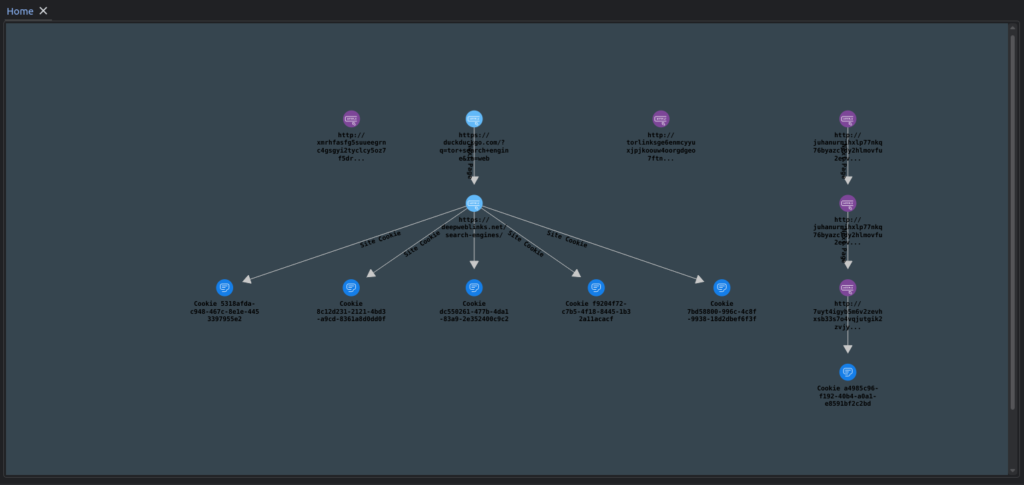
There are plenty of under-the-hood improvements done as well. We have improved the level of integration of LinkScope with TOR, and now you can import your browsing sessions directly:
Graph of a very short TOR browsing session.
This import works a little different than the regular browser session imports: Instead of trying to replicate the state of the browsing session, the software just reads the session information from the TOR browser profile session file. In the future, we want to have TOR integrated as a core component of LinkScope, allowing for more streamlined dark web resolutions.
Speaking of resolutions, we have added even more in this latest release! From extracting wallets to working with spreadsheets, LinkScope is here to help you investigate anything and everything, in just a single click.
There’s a lot more exciting stuff to come! If you’re new to using LinkScope, now is the best time to dive into it. Check out the introductory blog post to get started. If you prefer watching videos, we have short clips of all the common tasks you can do over at our YouTube channel.
]]>AccentuSofthttps://accentusoft.com<![CDATA[LinkScope 1.4.0: Macros]]>https://accentusoft.com/?p=13112022-10-17T15:17:28Z2022-10-17T15:17:28ZGreetings investigators! LinkScope version 1.4.0 was just released! Download the installer for the software from the ‘Downloads’ page. This release includes the long-awaited Macros feature! Macros allow users to run a list of Resolutions, one after the other. This feature aims to help automate workflows where users have defined data pipelines. You no longer need […]
]]>Greetings investigators! LinkScope version 1.4.0 was just released! Download the installer for the software from the ‘Downloads’ page.
This release includes the long-awaited Macros feature! Macros allow users to run a list of Resolutions, one after the other. This feature aims to help automate workflows where users have defined data pipelines. You no longer need to watch the screen for the moment each resolution finishes!
Users can create Macros through the ‘Node Operations’ menu, and selecting the ‘Create Macro’ option. Then, users import the desired resolutions (and arrange them in the desired order), and press ‘Confirm’ when done. That simple!
Creating a Macro takes less than 20 seconds!
Running a Macro is equally straightforward: Users select the Macro they want to run, and click the ‘Run Macro’ option. Upon running, the first resolution will prompt the user to select what entities they want to use as input, if none are selected on the current canvas. One by one, the resolutions in the macro will take the entities they are given as input, process them, and pass their result to the next resolution. The results of each resolution will be immediately visible.
Sit back and relax while LinkScope processes your data.
Other than the shiny new feature, this release also contains a major refactor that was in the works for quite a while. We have trimmed and optimized a lot of the code in the core application, fixing bugs and speeding up operations. This release also includes new installers, and release binaries that are compiled using Nuitka. The binaries are smaller, and the software should feel faster than ever before.
Finally, we have uploaded a series of short tutorial videos to our YouTube channel. The intent of these videos is to provide a visual aid for using LinkScope. The videos are aimed at beginners, and they showcase how to perform common actions within the software in less than 30 seconds. These are provided to complement the documentation on the software and the introductory blog post.
We aim to make available more training and tutorial materials in the future, to ensure that every user is properly equipped to use the software to its maximum capabilities.
]]>AccentuSofthttps://accentusoft.com<![CDATA[Recording browser sessions with 100 lines of Python]]>https://accentusoft.com/?p=11472022-09-02T15:55:54Z2022-09-02T15:48:34ZLearn how to save and screenshot every website you visit.
]]>Greetings investigators! Have you ever been 50 browser tabs deep in an investigation, only to realize that you don’t really have a good way of saving your session? You could just copy and paste each URL into a file, or save everything to a bookmarks folder and export it, but doing everything automatically is much better.
There are of course quite a few paid tools that do this, such as Hunchly and Vortimo, which are both very good. For the sake of learning however, we can build something simple that will take care of some basic tasks without the price tag, with only around 100 lines of Python code.
We’ll explain how in this blog post, but if you are impatient, then you can get the finished Python script here: Link.
It should be stated that the script we write will be for Firefox. Different browsers record session information in different ways, and the way Firefox stores its info is the easiest for us to work with. We will also be working on the Ubuntu Operating System (OS). If you use another OS for your investigative work, you may need to adjust a few lines in the script. Note that since the Tor browser is Firefox-based, this script could also work with Tor, with a few modifications.
Our plan for the script is simple: Record all sites we visit without duplicates, screenshot them, and save them to a file so we can check them out later. It is of course possible to do much more than just this, but for the purposes of this blog post, we will try to keep things simple.
Starting out, we need to know two things: Where the Firefox session information is stored, and where we should store the output of our own tool.
Firefox allows users to have different profiles that they use, and information about sessions is profile-specific. By default, Firefox comes with the ‘default’ and ‘default-release’ profiles. We can find these in /home/{username}/.mozilla/firefox, where {username} is the name of the user on the system. Note however, that each profile folder has a prefix of some random characters in front of it:
Profile folders are generated with random strings prepended to them.
We could, of course, hardcode the path for our system, but that would mean that everyone would have to change the script to make it work for their system. Instead, we use a technique called globbing, to specify a regex pattern that the script should look for:
We are after the “recovery.jsonlz4” file, so we want to get whatever path includes it.
Globbing means that the system will check all paths in the specified directory, and return a list of options that match the pattern. The file that stores the session information is ‘recovery.jsonlz4’, but we don’t know if it’s under the ‘default-release’ profile or the ‘default’ profile. Different people might use different profiles, and we want to make sure that our script works with all possible default settings out of the box.
To that end, we use globbing to let the OS tell us where the ‘recovery.jsonlz4’ file resides. It is unlikely that someone would be using both profiles, so we can safely assume that the list we get back will have only 1 item, which will be in position zero (lists in python start at index 0).
Fortunately, figuring out where to store the output of our tool is much simpler: We will make a new directory inside the current one (i.e. the one our script was launched from), and store everything inside there. Our directory’s name will be the timestamp of when the tool was ran, so that our users can distinguish between their different sessions easily.
The rest of the code is specific to the libraries we use in our script, but it’s function is actually pretty simple.
First off, we use the playwright library to emulate the operation of a proper browser. This is important for two reasons: One, some sites don’t work properly without JavaScript, so if you tried to save them, all you’d get would be a blank page saying ‘Please activate JavaScript’. Two, because JavaScript is sometimes used to request resources for the current page. Since we want to save everything we can to a file, not running JavaScript might mean that we miss out on some dynamically loaded resources that we would otherwise have gotten.
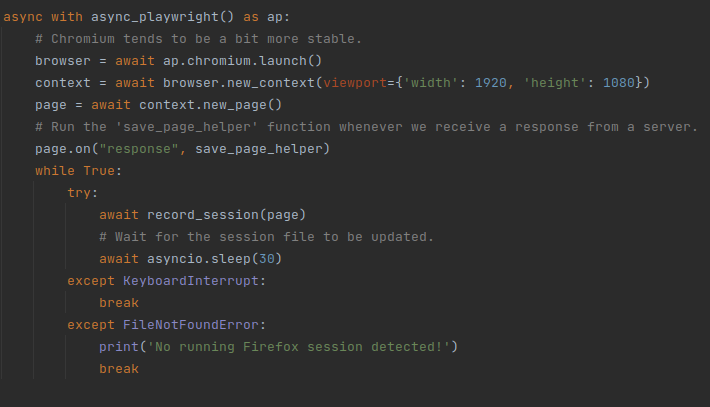
This is the code that starts a new browser session:
Start a new playwright session, and configure the “save_page_helper” function to run whenever we receive a response from a server.
Most of the code is initializing stuff and handling exceptions. The relevant bits are the lines of code where the “save_page_helper” function is made to trigger whenever we receive responses from websites, and the infinite loop in which we run the “record_session” function.
Let’s explore the “record_session” function first. In order to record our session, we need to know what pages we visited so we can save them. That information is stored in the ‘recovery.jsonlz4’ file that we located earlier, but it is compressed. We first need to decompress it, and load the information into a variable:
Check if the file starts with ‘mozLz40\0’ before reading, so we know we have the right thing.
We ignore the first 8 bytes – they are not part of the file’s data.
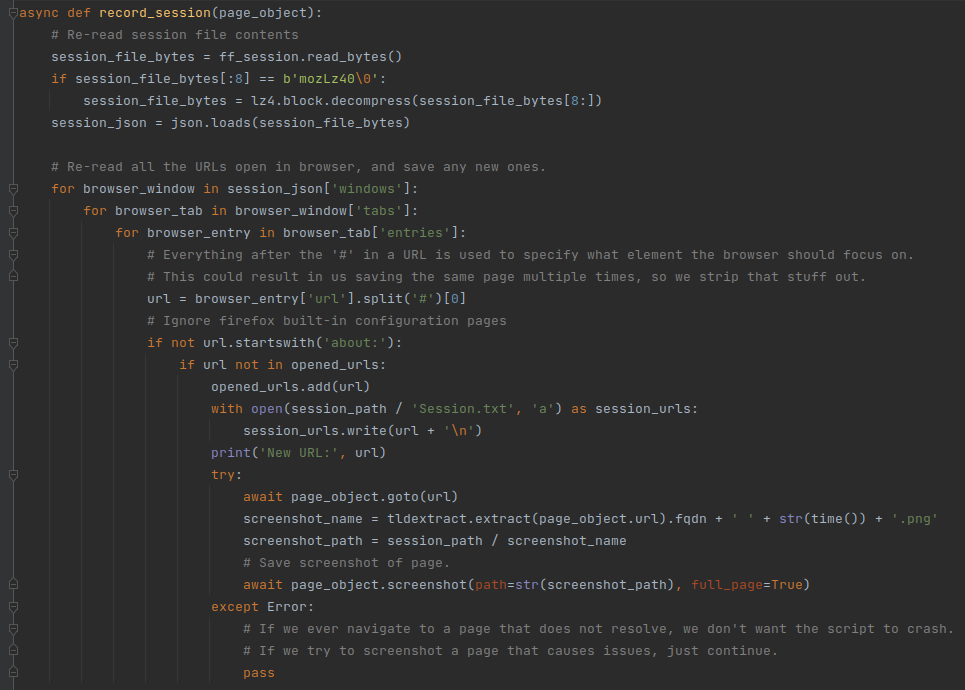
Now that we have the information in the session file, we need to extract the URLs that we visited. Each Firefox window has a list of open tabs. Each open tab has a list of URLs that we have visited. Some URLs are internal to Firefox (they begin with ‘about:’), so we can ignore them. As for the rest, we will check if we have seen them before. If we didn’t, we save the URL in the “Session.txt” file in the new directory that we created. Then, the playwright browser visits the page:
This code will execute every 30 seconds. The Firefox session file will be read, and any new URLs visited by us will be visited (and saved) by our script.
We have the playwright browser visit all the URLs, so that the “save_page_helper” function triggers and saves the pages to disk. For good measure, we also take a screenshot of the website – we’ll talk about this part of the code later.
Let’s continue by checking out what the “save_page_helper” function does. When we visit a page, we get a set of responses by the website that give our browser necessary information to display it. We have configured our browser to run a custom function whenever it receives information from a website:
Websites don’t tend to plead the fifth, so this code will usually get everything there is to see. Except if the website detects this as bot traffic, of course.
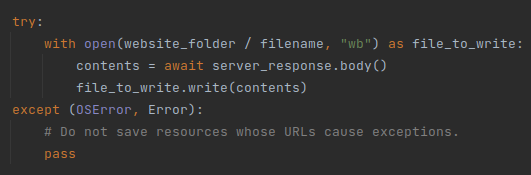
The ‘save_page_helper’ function essentially just saves the response we get from the website to a file. The name of the file corresponds to the URL of the resource being saved:
Writing everything to disk, unless we run out of disk space.
Some exceptions may occur in cases where the URL of a resource is too long to be a pathname, or if the system is running out of storage space. We make sure to handle those issues silently. In most cases, very long path names are tracking pixels with long UID codes. Normal website resources tend to have reasonable names and are going to be stored properly on the disk.
There is a caveat to this: opening a saved website won’t be the same as visiting it online – the formatting will have issues, and a lot of the resources in it will not appear. Still, the page and all the resources are stored locally. This ensures that investigators have backups of the text and pictures that were hosted on the website, in case that something happens in the future.
It is possible to save a page as a single file, with the correct formatting, in most cases. The way to do this would be altering the page’s code to include the resources as base64-encoded strings. While this is good for presentation, there are two main issues with it: One, it changes the source code of the page. This can be important if you want to have a copy of the code exactly the way it is online, for presenting as evidence for example. Two, by encoding the images as base64 strings, you miss out on extracting any potential metadata that they have.
To best of both worlds, we save the page as is, and then take a screenshot of the entire webpage:
Note that full page screenshots of certain sites can be really long, especially when it comes to forums.
If however you still want to save pages as files, and have them look the way they normally would, there is a tool that can help you: Webpage2html. This tool can also make adjusted copies of locally saved sites, so you can open them properly in your browser. There are also free browser extensions that can save sites as a single file locally, like SingleFile.
Lastly, there is one very important thing that we have to do, and that is to give our tool a catchy name: FireWatch. Our tool has nothing to do with the actual concept of a fire watch, but the name sounds cool, so we went with it. If you didn’t click the link to the tool in the introductory paragraphs, here it is again to save you the scrolling: Link to FireWatch.
For the purposes of this blog post, we will stop development here, though there is still some room for improvement. For starters, the cookies that a browser stores often have an impact on their browsing experience. Re-creating the cookies used by the Firefox browser should take us a step closer to replicating our browser activities.
Additionally, having some means of mapping out our path through the websites on each tab would help an investigator remember what lead they were following during their browsing session. Investigators might also need to quickly pivot from their session information – for example, scraping all URLs and contact information from a set of trafficking pages.
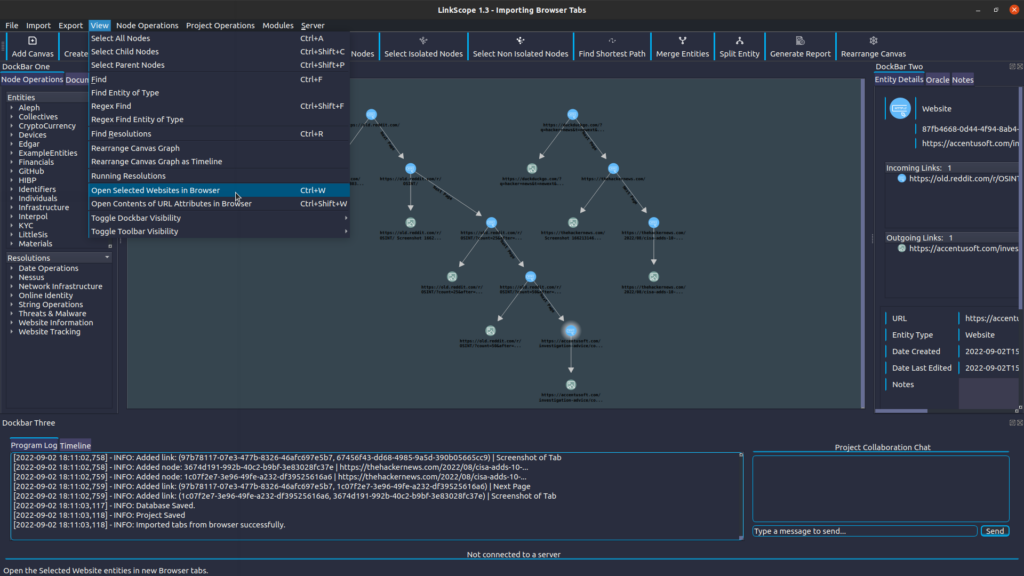
LinkScope comes equipped with the ability to seamlessly import your browser tabs as entities – no external tools needed! Import your entire session, showing what URLs were visited in each tab, and take a timestamped screenshot of every page:
Then, pick up where you left off, by selecting the websites you are interested in and opening them in your browser:
Any URL-like attributes can be opened in the browser, from any number of entities.
The browser is the primary way of exploring the the world’s largest data set, the Internet. Making sure that your workflow includes tools that streamline your interaction with it makes your investigations faster, and more effective.
We hope that you’ve enjoyed this brief dive into Python scripting, and that you’ve found our blog post helpful!
]]>AccentuSofthttps://accentusoft.com<![CDATA[Connecting Usernames and Emails to Social Media Profiles]]>https://accentusoft.com/?p=10812022-08-19T19:32:51Z2022-08-19T17:00:51ZIn this blog post, we will go over how such tools and services work, and show you how you can easily fit SOCMINT (SOCial Media Intelligence) checks in your investigative workflow.
]]>Greetings investigators! You’ve no doubt come across a variety of tools and services that search social media sites, from Facebook to Github, to find registered users and/or emails.
In this blog post, we will go over how such tools and services work, and show you how you can easily fit SOCMINT (SOCial Media Intelligence) checks in your investigative workflow.
There are lots of such tools: Holehe, Sherlock, Maigret, Social Analyzer etc, and most of them function in a similar way. In this blog post we will look at a tool called ‘WhatsMyName’ by WebBreacher, as its simple and straightforward structure makes it easy to explain. The tool itself is available here: Link.
The Github repository of the tool has a lot of files, but we only really need to look at one: ‘web_accounts_list.json’. The file looks a little bit like this:
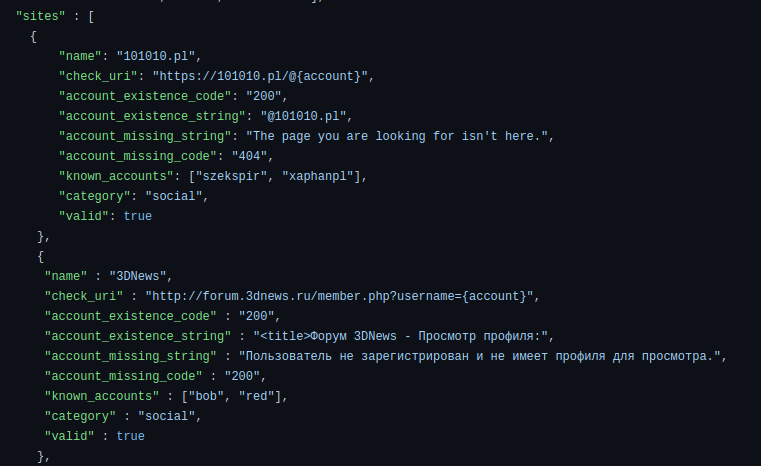
A snippet for the websites queried for accounts.
The main part of the file is a list of sites to check for account names. For example, if you’re looking for someone with the username ‘Test123’ on the website ‘101010.pl’, you would visit the URL ‘https://101010.pl/@Test123’.
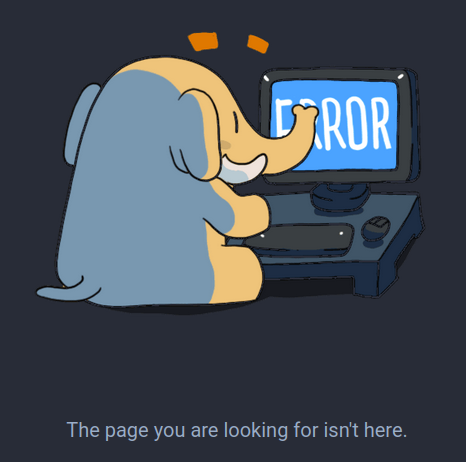
Sites often behave differently when you enter valid information versus when you enter invalid information. In this case, if the username you are checking exists on the website, you will get a response with the user’s profile, which would contain the string ‘@101010.pl’. If the username does not exist, you will instead get a response with the string: ‘The page you are looking for isn’t here.’:
Discrepancies in behavior between existent and non-existent users give us valuable information.
By checking what response you get from the website, you can validate whether a username exists or not. HTTP Status Codes (i.e. 200 OK, 404 Not Found) can often tell you if a page exists or not just by themselves, though that is not always reliable.
Of course, there can be false positives in the case that the test is not strict enough. Furthermore, some sites, especially ones belonging to prominent companies, are very diligent when it comes to security. If a site returns the same response for both registered and non-registered users, we cannot determine if an account on that site exists.
Not all sites can be enumerated by simply visiting a link to a profile. Some sites don’t even function without Javascript, so sending a request to a URL through the commandline is not always going to give good results, if it gives any at all. A lot of tools omit sites that require user interaction, as interacting with a website often requires emulating a browser. So, how would one go about checking for accounts on these types of sites?
Fortunately for us, social media sites frequently sacrifice some security for usability, and give us information to help us deduce whether someone signed up for the site or not.
If you ever forgot your login details for a site, you’ve probably been told by the website that your username or password was incorrect. This is proper behavior, since it obfuscates whether a user actually exists or not.
But what happens if you try to log in, and the site instead tells you this:
Too much information being given here.
You now know that the user you’ve been trying to log in as exists! Knowing what sites your target uses could be invaluable for an investigator, as criminals often are not diligent enough when it comes to scrubbing their social media presence.
Of course, checking each site individually is a lot of work; which is where tools come in. There is a large variety of social media querying tools, but some of the open source ones that are frequently mentioned are Holehe, WhatsMyName, MailCat, Social Analyzer and Snscrape. These tools will query a large number of sites and give you results that you can follow up on.
As mentioned before however, the tools mentioned do not work with sites that require Javascript-based interaction. There are very few tools available that emulate browsers for the purposes of account enumeration. Such tools typically use libraries like Playwright, Puppeteer and Selenium in order to appear as a genuine browser user to websites.
Even fewer tools take the necessary precautions to evade bot detection and avoid triggering CAPTCHA prompts. A lot of the anti-bot measures are kept secret by the companies implementing them, but some researchers have made test websites that let you see how ‘human’ your bot is. These can serve as a good starting point for anti-bot evasion. One of them is available here: Link.
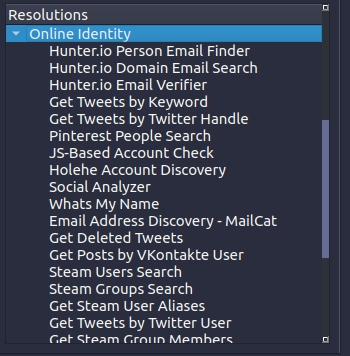
Even after using tools to find accounts, you will have a dozen reports, all in different formats, that you now have to link together, deduplicate, check for correctness, and follow up on. This is busywork that we believe investigators should not have to do. For that reason, we have integrated all the SOCMINT tools we mentioned (and more!) into LinkScope, including a Javascript (JS) based account check:
The resolutions palette, available on the bottom left part of the software, allows for running queries to uncover details regarding online identities.
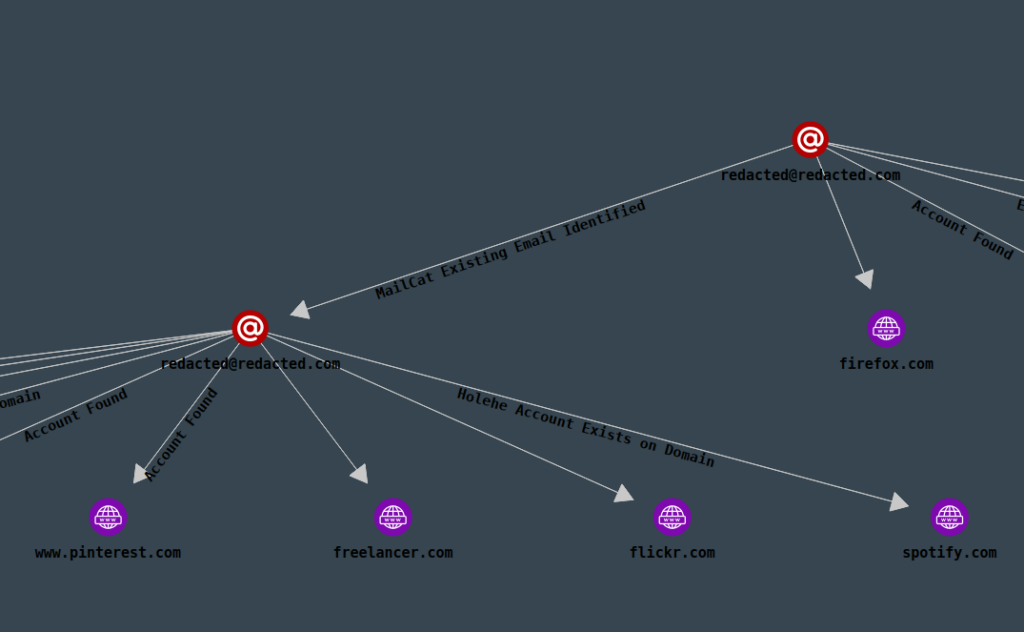
Everything found by each of the tools will be presented in a nice graph, showing you how your findings are connected, and help you pivot from your information in just a few seconds:
Uncover everything with just a few clicks!
We also have an introductory blog post if you’re new to using LinkScope, available here: Link.
As a last piece of advice, note that no matter what tools you choose to use, it is important that you run checks like these from a clean workstation. A Virtual Machine with a fresh Operating System installation (that is, you have not done anything with the Virtual Machine yet) is the best working environment for investigations. If your working environment is not clean, the tools you run that try to detect the existence of accounts might run into issues.
An example of an issue you might run into, is that if you’ve previously logged into LinkedIn on your computer, LinkedIn remembers this and will present you a different login screen, which might cause false positives or false negatives. Remember to at least clear out cookies between scans!
]]>AccentuSofthttps://accentusoft.com<![CDATA[LinkScope 1.3.0: LinkScope Query Language]]>https://accentusoft.com/?p=9972022-06-27T07:05:41Z2022-06-27T07:05:41ZLinkScope Version 1.3.0 was just released!
]]>Greetings investigators! LinkScope version 1.3.0 was just released! Download the installer for the software from the ‘Downloads’ page.
The main feature that we are delivering in this version is the LQL Query Wizard. LQL stands for LinkScope Query Language, and it is a powerful graph query language that lets you filter through the graph database of your project.
With conventional databases, queries search for elements across tables, and conditional statements are only used for comparisons of element values. Graph databases, however, are more complex. Each element is more than just a row in a table; every single entity could have a varying number of attributes, or be part of a convoluted web of relationships that an investigator has to make sense of.
It is therefore necessary to be able to select nodes with more than just value qualifiers. The ability to view which nodes are part of which relationships can drastically quicken any investigation. This is where LQL comes in.
LQL allows users to select entities based on the values of their attributes, as well as their relationships with other entities. Take the following graph for example. There are a series of transactions made, represented as Currency entities, between a lot of different organizations.
Let’s say we want to check out all incoming transactions made directly to Gold Star LTD, the top node in our pyramid, and see how much money is flowing into the company. Our query will be as follows:
SELECT the ‘Amount’ field, which is used by the Currency entities to show the money they represent, FROM the ‘Home’ canvas, as we only want to consider nodes in this particular graph, WHERE the entities have a parent-child relation with the ‘Gold Star LTD’ entity, MODIFY the values in the ‘Amount’ field to be, and to be treated as, numbers.
And with that said, here is a video showing the LQL Query Wizard in action:
And that’s not all! In this update, we introduced a feature that allows investigators to detect cycles in graphs. Having entities lead back into themselves is normal in some cases, and highly unusual in others. In the cases where you want to see if it all goes back to the start, there is no faster way than to use the ‘Extract Cycles’ functionality.
As for how it works, there is no better way to explain it than with a 10 second demonstration video:
With every new update, we aim to improve the arsenal of tools that investigators have at their disposal, to assist them in uncovering significant data and patterns in an otherwise confusing web of information. We expect that this update will offer a considerable boost in capabilities for everyone using LinkScope.
]]>AccentuSofthttps://accentusoft.com<![CDATA[LinkScope 1.2.0: Collectors]]>https://accentusoft.com/?p=9512022-05-09T15:05:44Z2022-05-09T15:05:44ZLinkScope version 1.2.0 was just released!
LinkScope version 1.2.0 was just released! Download the installer for the software from the ‘Downloads’ page.
There are a lot of improvements (and bug fixes) in this version of the software; in this blog post, we will go over the most significant one: Collectors.
During investigations, it sometimes is necessary to monitor a data source for a period of time, and be alerted when something happens. What you want to monitor could be anything – different companies have different needs. For example, departments focusing on third party risk management would be on the lookout for negative media regarding any of their business partners; cyber security professionals would instead want to monitor the dark web, hacker forums and paste sites for any mentions of their organization, and so on and so forth.
You might even want to have different things happen based on what you observe, ignore certain behaviors, or even dynamically expand the scope of your monitoring based on different events. All of this is now possible through Collectors!
Collectors run on LinkScope Server deployments. On the server, various different harvesters gather data from all manner of different sources, and Collectors pick and choose which pieces of data are relevant to them, whenever it is made available. Collectors then return such data to the client, either immediately in the form of an email / notification in your workplace communications platform of choice, e.g. Teams, Slack etc., or whenever the client next connects to the server, in the form of desktop notifications and new entities being generated in the project database.
Each Collector is configurable, and multiple instances of each can be ran concurrently. A Collector that collects negative media for example, can be ran once for each company you wish to monitor, and send notifications in different ways to different people – for example, one could receive an email, another could get a Teams notification, etc. Alternatively, you could run just one instance of the Collector, and have it monitor every company by itself.
Collectors are a powerful and versatile tool for data source monitoring which should be in every investigator’s arsenal.
]]>AccentuSofthttps://accentusoft.com<![CDATA[Methods for Identifying Sister Sites]]>https://accentusoft.com/?p=9112024-07-05T07:49:53Z2022-04-19T15:03:21ZGreetings investigators! In this blog post, we will explore some of the information that a person can deduce by exploring a website. Specifically, we will go over some of the things that could help you identify if two sites are owned by the same entity.
]]>Greetings investigators! In this blog post, we will explore some of the information that a person can deduce by exploring a website. Specifically, we will go over some of the things that could help you identify if two sites are sisters – that is to say, they are owned by the same entity.
If you are reading this before LinkScope Client version 1.2.0 is available, and you wish to follow along, you may need to clone the LinkScope repository in order to get the latest version of the software. We will be using some Resolutions that were created after version 1.1.1 was released. If you happen to be new to LinkScope, there is an introductory post in our blog that goes over the basics.
Our scope for today will cover a relatively well-known misinformation website called ‘Natural News’. How well-known exactly? Well, Wikipedia includes it in their list of fake news websites, and it even has its own Wikipedia entry. The Wikipedia pages themselves contain some background information about the site and its owner. To summarize the parts relevant to our investigation, the site was banned from Facebook after it was discovered that it was using content farms to boost its popularity. The owner tried to circumvent the ban by creating a lot of new websites, one for each topic that the Natural News website covers.
Our objective is to have a look at a few of the sister sites of Natural News, and see what indicators we can uncover that reveal that they are operated by the same entity. In this case, we already know what the verdict will be, but this is useful practice for cases where the relation between different sites in a disinformation network is not so obvious. As of the date of writing of this blog post, the sites covered are operational, and all the indicators that the article goes over can still be observed.
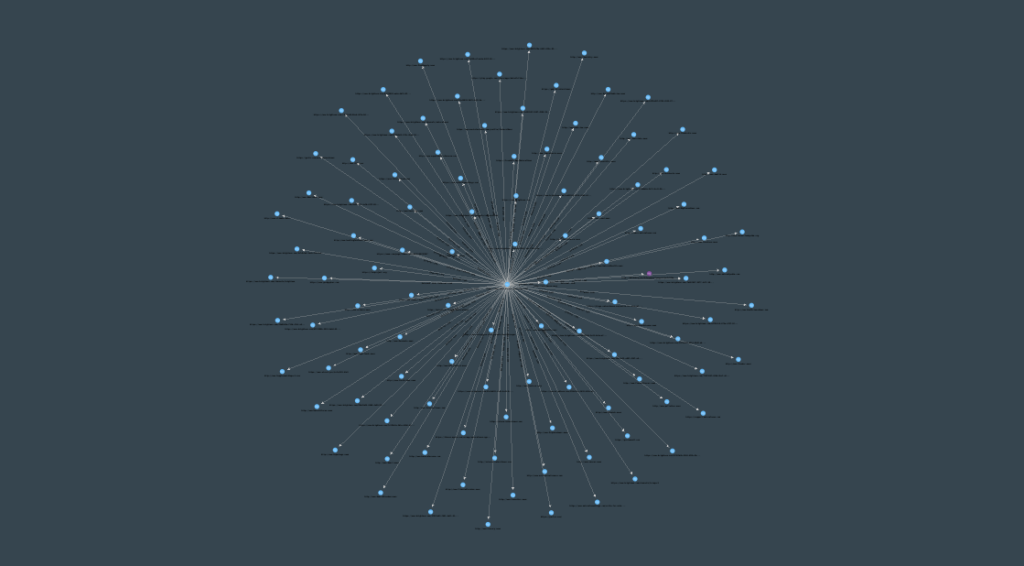
Of course, we could simply visit Natural News and scrape the URLs of all the sites it prompts readers to visit. For the sake of this example however, we are not going to do that. Just as well, because there’s a lot to go through:
The purple entity is an .onion website, for anyone looking for organic disinformation in the dark web.
Before we begin, we should note that there are a few ways to reveal that some sites are owned by the same person. The most conclusive and straightforward way of doing so is checking out the tracking codes that each site uses. Tracking codes are short strings of characters that are sent to analytics websites when a user visits a site. The request made by the user contains some information that allows owners of sites to see how many users visit their website, what pages they visit, and so on and so forth.
Most commonly used are Google tracking codes, which come in several formats. Google Analytics IDs for example begin with “UA-” and then are followed by a string of numbers, while AdSense IDs begin with “ca-pub-“, and then, you guessed it, are followed by a string of numbers. Some less common Google tracking codes include the Google Tag Manager tracking codes, which begin with “GTM-” and are followed by a set of alphanumeric characters, and Google Measurement IDs, which begin with “G-” and are followed by a set of alphanumeric characters.
One last thing before we dive into this: If you want to follow along, you need to install the Extra Module Pack to obtain some of the resolutions we’ll be using. To do this, on the top bar, navigate to Modules -> View Module Manager. In the Module Manager, scroll down until you see the Extra Module Pack, and select it. You can double-click to check what modules it includes. Click the “Install Module Pack” button to install it. Once done, you’re ready to go.
Alright, let’s start the investigation! The specific sites we want to have a look at are the “FoodScience” and “FakeScience” sites, at “http://www.FoodScience.news” and “http://www.FakeScience.news” respectively. Let’s start by creating two Website entities to represent these sites:
Checking for tracking codes manually can be a pain – they could be in the source code of the page you visited, or hidden away in some of the content that was loaded alongside it. The code could even have been dynamically constructed by a JavaScript script, so you wouldn’t find it if you ran a naive text search of the page’s source code.
The best way to discover the tracking codes is to visit the page, and observe what web requests are made by the browser. The tracking codes will be included in those requests – your browser will contact Google’s servers (or the servers of the relevant tracking code provider), and the tracking code belonging to the website will be visible in the request. This method offers the highest degree of success when it comes to discovering a website’s tracking codes. It is not as fast as crawling source code with non-JavaScript capable crawlers, but it will never present any false negatives; that is, you will be able to see all the tracking codes that a site uses, even if they are not spelled out in the source code.
LinkScope has a resolution that does just that. Under the “Website Tracking” category, double-click the “Extract Tracking Codes” resolution after selecting both website entities. After a brief wait, we discover that both sites share the Pingdom tracking ID “pa-5ad0c0be46534f00070006b7”:
Since each tracking ID belongs to one account with an analytics provider, we can state with a high degree of confidence that both these sites are managed by the same entity. There are several websites that offer a tracking ID search engine, such as SpyOnWeb and AnalyzeID, which can be used to search their databases for any websites that have that specific tracking ID. Do make sure to verify any results you get – sites can update their tracking IDs and even the analytics platforms they use at any point, so some results could be outdated.
We can take this a step further. Another way to identify whether two websites are owned by the same entity is by inspecting the technologies that they use; websites belonging to the same entity are likely to use the same technologies, as maintaining different technology stacks can be expensive. Inspecting the technologies used by a website can be done in a number of ways. One such way involves using a utility like ‘Wappalyzer’. Wappalyzer scans the source code of websites to see what technologies are referenced. Overall, this is a weaker indicator than tracking codes, and does not signify sister sites by itself. However, the circumstantial evidence that two sites use exactly the same technologies could be significant in an investigation.
To do this, we create a new canvas (shortcut: Ctrl-N), select the “FoodScience” and “FakeScience” website entities, right-click and select “Send Selected Entities to Other Canvas” in the menu that pops up. We send these entities to the new canvas we created, so that the results of each of our operations are displayed in different canvases. This keeps our investigation neat and tidy.
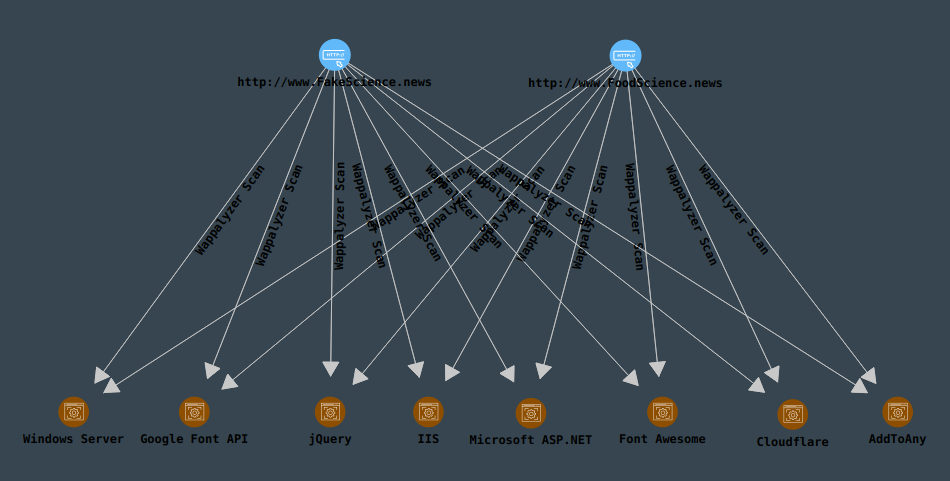
In the new canvas, we select the website entities, and under the “Website Information” resolution category, we double-click to run the resolution “Wappalyzer Website Analysis”. Several different technologies are identified, all of which are shared between both sites:
At this point, it is pretty obvious that both these sites are managed by the same entity. Visiting the sites themselves supports this conclusion: the sites look almost identical.
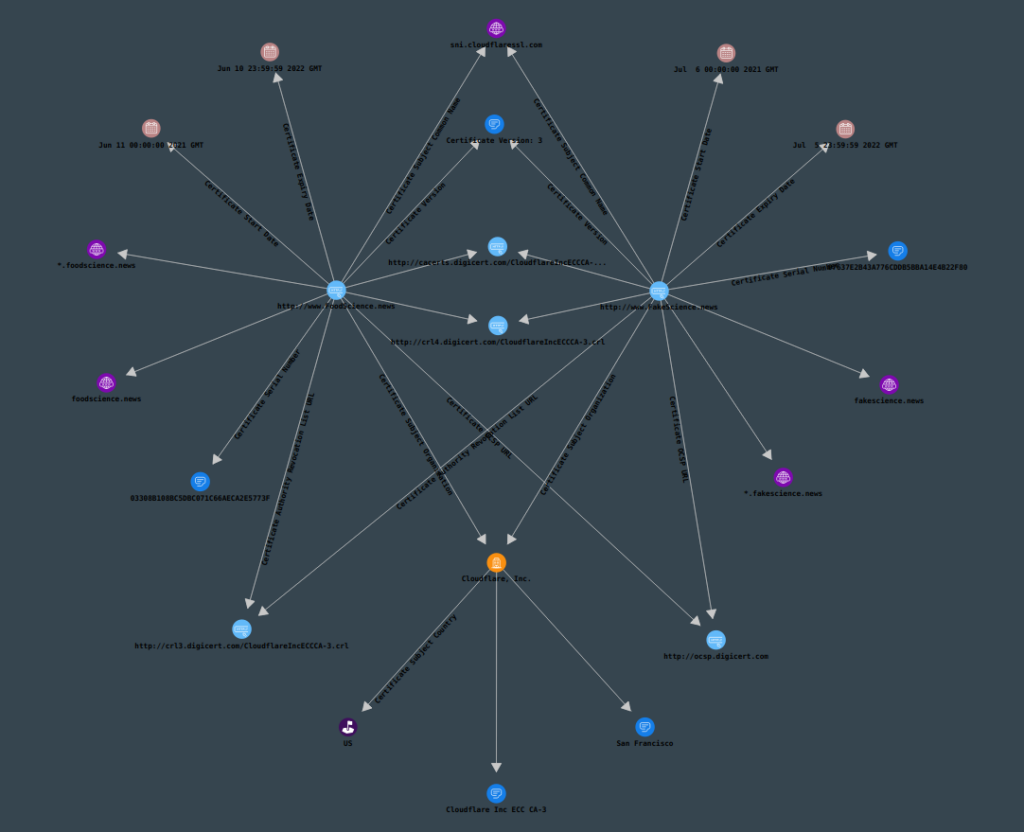
As a bonus, there is one easy, albeit inconsistent, way to get information about a particular site: Inspecting the site’s certificate. Sometimes, this contains information about the organization that the site belongs to. We could check both sites’ certificates with the resolution “Analyze Website Certificate”, under the “Network Infrastructure” resolution category.
Checking certificates can also help you enumerate subdomains when performing security evaluations.
In this case, we don’t gain much information; only that both sites use certificates signed by CloudFlare. Inspecting the domain’s certificate can sometimes give you a lot of very useful information, so it’s always a good idea to do so whenever you are able to.
That wraps up this blog post on tracking website owners. We hope that you have found this educational. If you enjoyed reading this, make sure to keep an eye on our blog, as we will be posting more news, tips and tutorials on a variety of topics!
]]>AccentuSofthttps://accentusoft.com<![CDATA[First Steps with LinkScope Client]]>https://accentusoft.com/?p=7782024-07-04T17:49:16Z2022-01-03T17:09:47ZGreetings investigators! In this blog post, we will cover some of the basics of using LinkScope, and see how it can assist with online investigations.
]]>Greetings investigators! In this blog post, we will cover some of the basics of using LinkScope, and see how it can assist with online investigations. Our target for this investigation will be AccentuSoft, and we will aim to uncover some details about where this website is hosted. Feel free to follow along this tutorial – the best way to learn is by doing.
Note: If you are on Windows, you may need to run LinkScope as an Administrator, otherwise you might face errors related to permissions when doing certain actions.
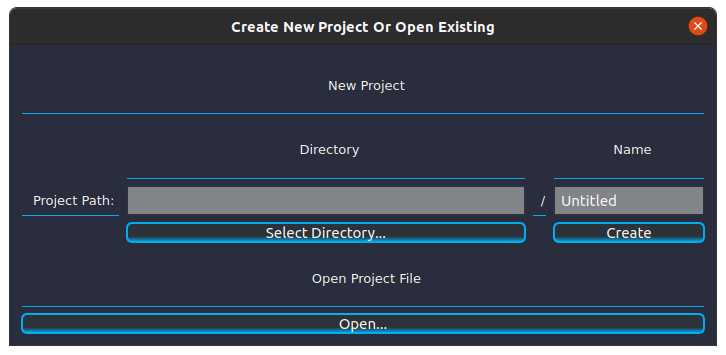
Starting from the beginning, let us create a new project. Click on the ‘Select Directory…’ button, and pick a folder to store the project in (or create a new one). Then replace the ‘Untitled’ text with a name that describes your current investigation. We chose the name ‘AccentuSoft Footprint’ for our project. Once you have picked a name, click ‘Create’ to create your new project.
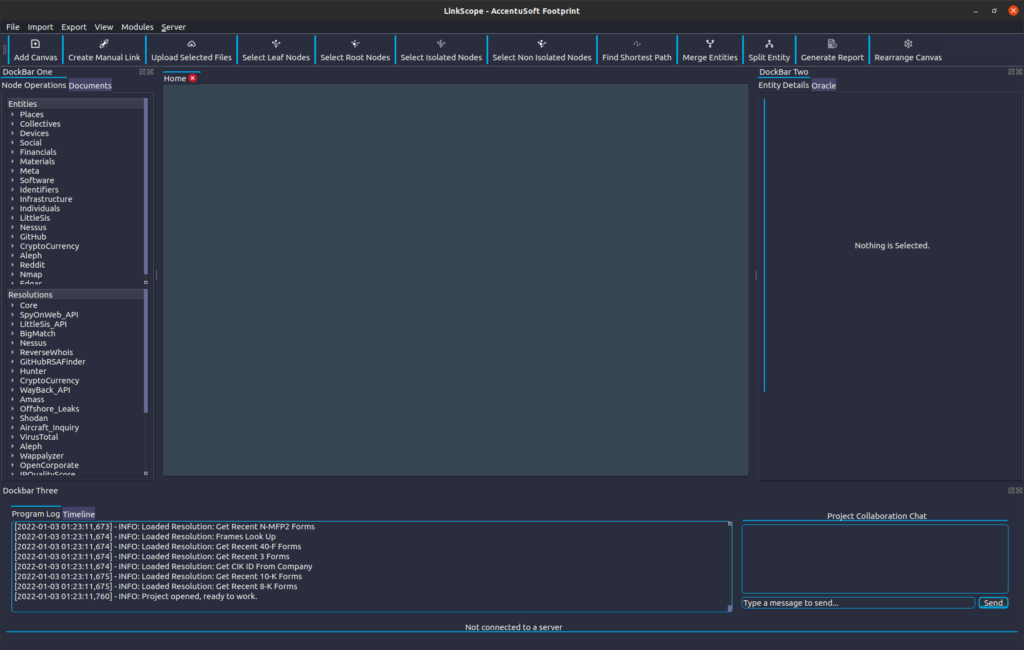
Once at the Main Window, there are a few things to note about the software’s interface. The software utilises Entities and Resolutions to display and resolve information. Entities are small, discrete amounts of information for any particular thing. They are broken down in the categories you can see in the ‘Entities’ section, which is by default on the left side of the window, under the ‘Node Operations’ tab on DockBar One.
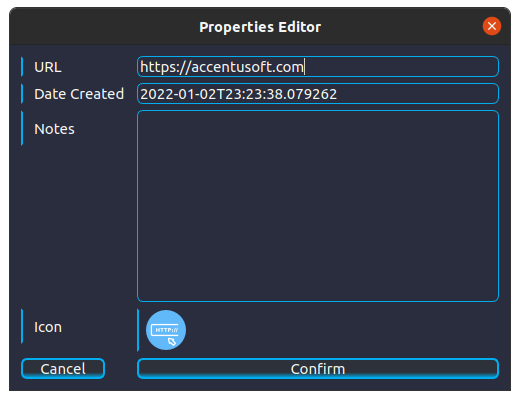
Let’s begin by defining an Entity to represent AccentuSoft’s website. In the ‘Entities’ section, we will expand the ‘Infrastructure’ category by clicking on the arrow next to this category’s name. After locating the ‘Website’ entity entry, we will drag it onto the canvas at the center of the Main Window, to create a new entity object. Upon releasing the mouse button, you should see the Properties Editor appear. In the ‘URL’ field, we will replace the ‘None’ value with the URL of AccentuSoft’s website: ‘https://accentusoft.com’. We don’t need to alter any of the other fields, so we click ‘Confirm’ to apply our changes.
Note that we could also have dragged the URL from our browser’s navigation bar into the canvas to achieve the same effect. In this case however, we opted to define our entity manually.
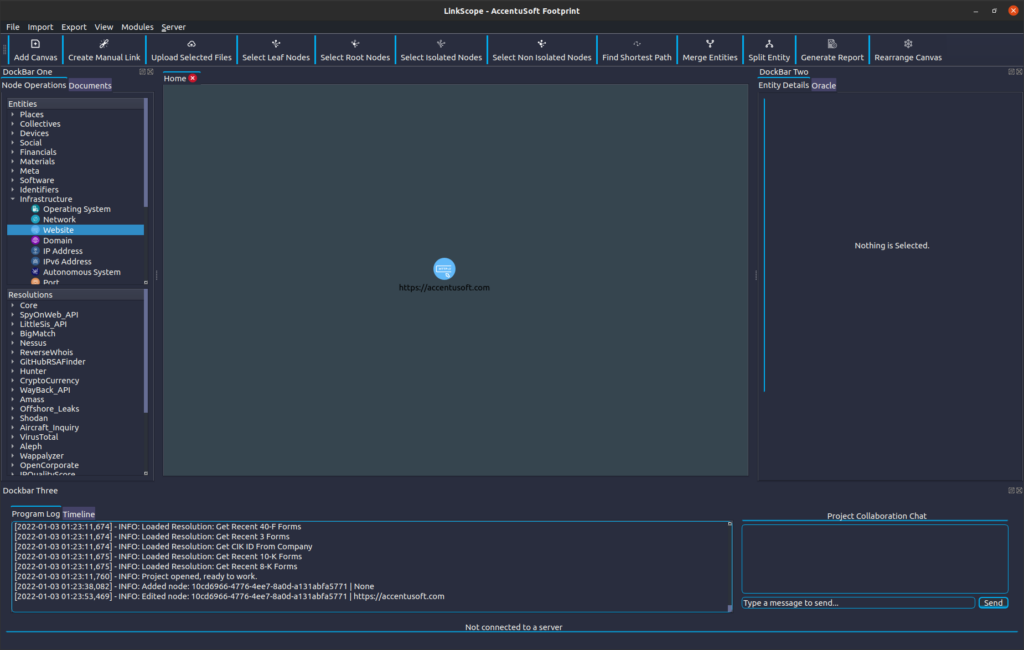
If you have followed along thus far, your project should look similar to this:
If you currently have selected the Website entity we just created, on the Entity Details pane in DockBar Two (by default, on the right side of the window), you should be able to see a detailed breakdown of the entity’s attributes.
With our target defined, let’s now actually start extracting some information about it. The acquisition, extraction or resolution of data in LinkScope is done through Resolutions. Resolutions take as input a set of Entities of particular types, on which they perform their operations. These operations could result in additional information being acquired, represented as new entities that are then displayed in the software.
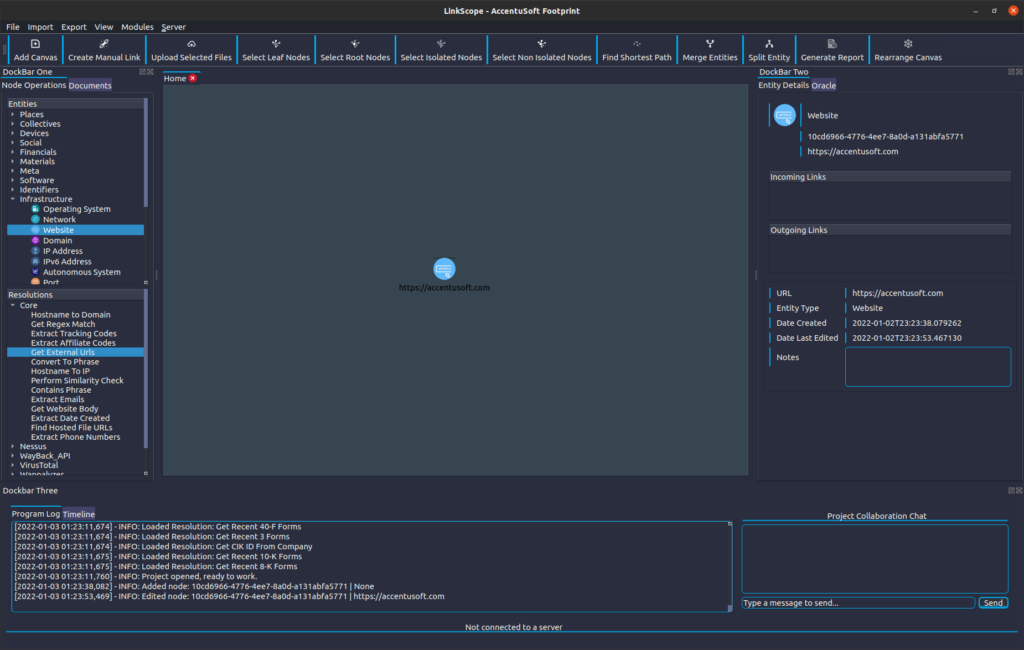
Back to DockBar One, we will now move to the ‘Resolutions’ section, and expand the ‘Core’ category. Locate the ‘Get External Urls’ resolution:
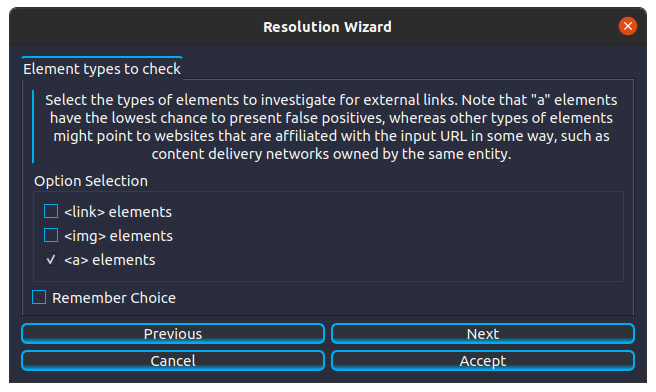
While making sure that we have the website entity selected (we can click on it to re-select it if we de-selected it), we double-click the resolution’s name to launch it. This particular resolution can be fine-tuned by configuring some of its parameters, so we are shown the Resolution Wizard to help us do so:
We will however leave everything as it is, and simply click ‘Accept’ to launch the resolution. While that resolution is running, we will locate the ‘Hostname To IP’ resolution (which is again under the ‘Core’ category), and double-click it to launch it. Note that this resolution does not require any configuration, and it is launched immediately. It also completes its execution faster than the ‘Get External Urls’ resolution. Different resolutions require different levels of configuration, and have different execution speeds that largely depend on the set of operations that they perform.
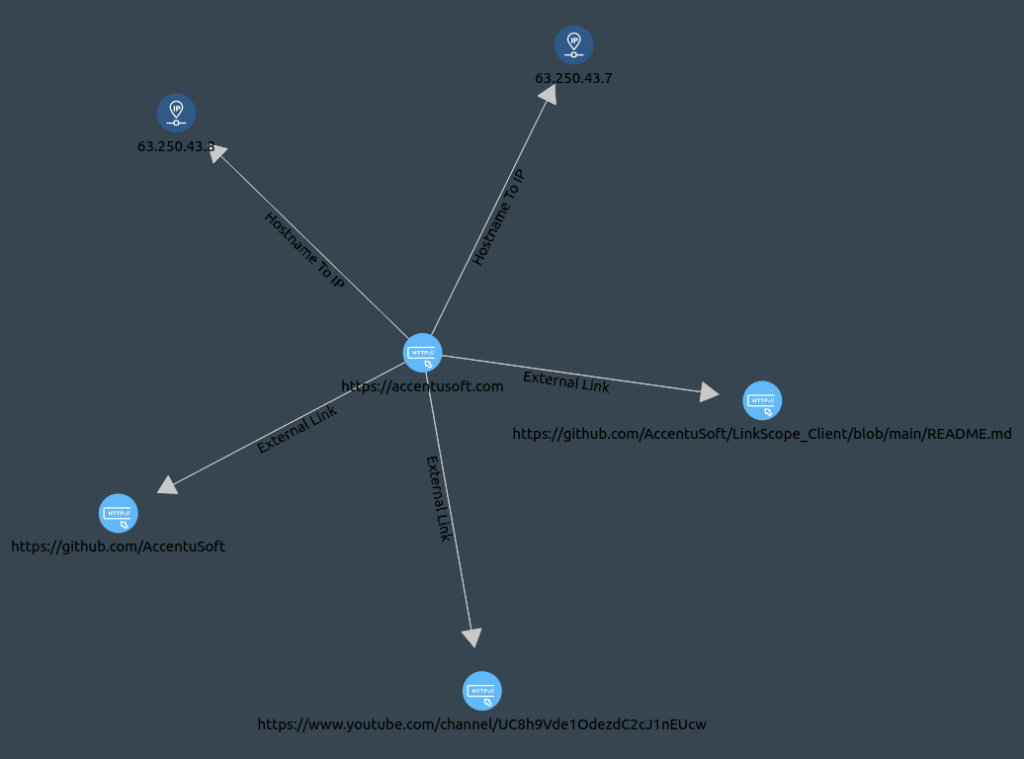
After waiting for the ‘Get External Urls’ resolution to finish, we observe what we have discovered:
Note that your results may differ from these, depending on when you performed the investigation. As of the date of writing this article, we can see that AccentuSoft’s site points to two external domains. One link points to what appears to be the company’s YouTube channel, where we could keep up to date with new video releases of informative content by subscribing, and clicking on the ‘bell’ icon next to the subscribe button to change the notification settings for new content to ‘All’. The other links point to the company’s Github page, where the source code for the LinkScope Client software is hosted.
The external URLs of a website can give us an idea of what sites the owner of the original website is affiliated with, or hosts content on. This can help us discover the extent of the company’s web presence, and in the process, help us get more information about our target. Do note that while LinkScope is extracting publicly available information, we should be careful to constrain our investigation to the scope we defined. This is not only because companies other than our target may not appreciate users indiscriminately scraping data, but also because being careful with what we investigate also minimizes the traffic we send over the internet, which reduces the size of our footprint on any logs that companies might collect.
Let us now turn our attention to the IP addresses we collected. These should help us answer our original question of where AccentuSoft’s website is hosted. We will first clear any entities we have selected by left-clicking on an empty spot on the canvas. Then, we will right click near the IP addresses, and make sure to hold the right mouse button down. This way, we can create a selection box, which we can expand by moving our mouse until it covers both the IP address entities, before releasing to confirm our selection. We don’t mind if we also select the links that point to them in the process.
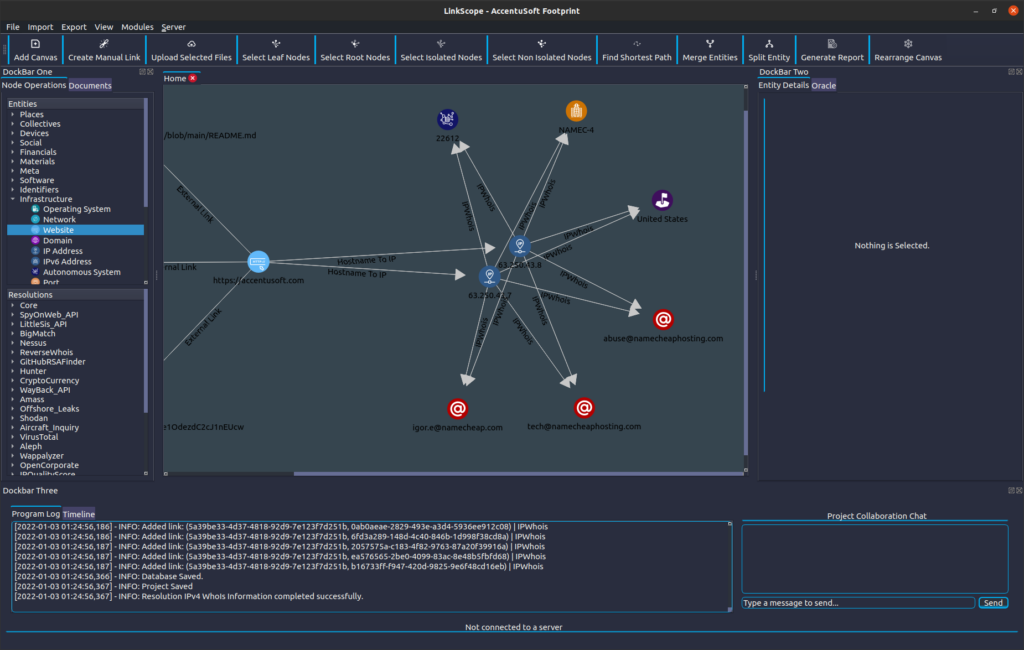
In the ‘Resolutions’ section in DockBar One, under the ‘Core’ category, we will now run the resolution called ‘IPv4 WhoIs Information’ by double-clicking on its name. We should see the following result:
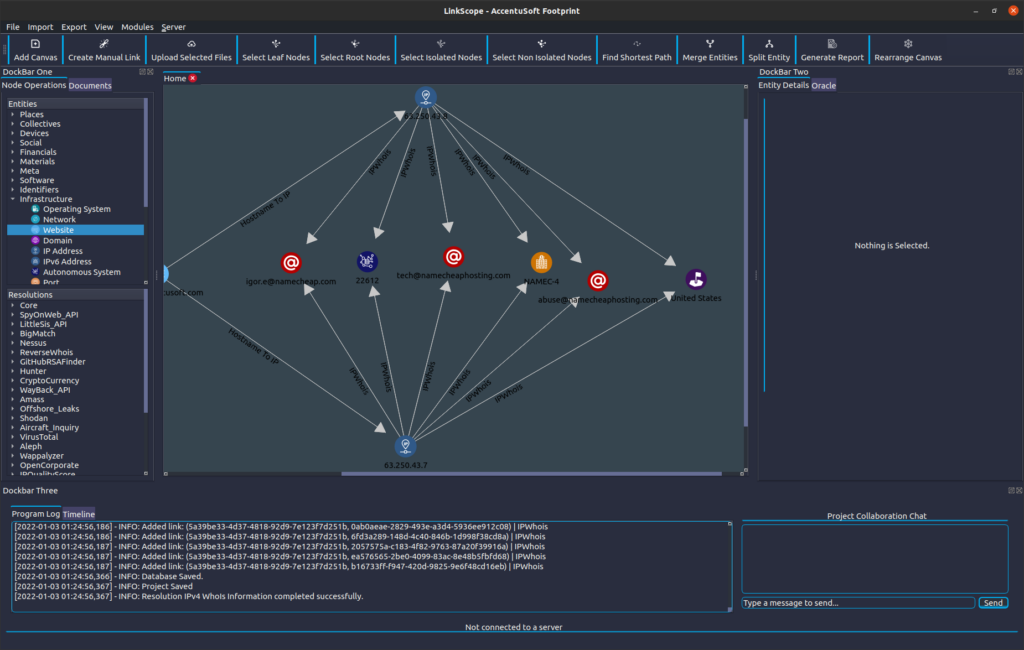
The software automatically rearranges the Nodes on the canvas in a way that tries to maximize information density. We may however sometimes feel that a different configuration is more clear or intuitive. By clicking and dragging the nodes around, we can rearrange them like so:
We can see that both the IP addresses belong to Namecheap, which is a domain name registrar that also provides hosting services. We can tell that the server that the website is hosted on is in the United States, and we have some emails that were mentioned in the WhoIs entry for this domain.
If we felt like it, we could export a picture of our current Viewport (as in, the section in a canvas that we are currently viewing) by selecting the ‘Save Picture of Canvas’ option, which is under the Export menu at the top left side of the window. This can be helpful if we wish to show graphically what we discovered in an investigation in a report or presentation. No need to fiddle around with screenshotting tools!
And with that, we have answered our original question, and concluded our investigation. We hope that this blog post helped you understand the fundamentals of using LinkScope, and given you an idea of how it can help investigators uncover information, discover how it is interconneted, and report on their findings. Keep an eye out on this blog for more news, tutorials and examples of how LinkScope can improve and streamline investigations.
]]>AccentuSofthttps://accentusoft.com<![CDATA[Welcome to AccentuSoft’s Blog!]]>https://accentusoft.com/?p=3182021-12-14T15:17:38Z2021-10-01T07:50:09ZGreetings and welcome to AccentuSoft's blog! This post marks the beginning of our journey as a company. As we progress, we will be posting announcements, updates, as well as helpful content about our products on this page. We hope that you find the content useful, or at least entertaining.
]]>Greetings and welcome to AccentuSoft’s blog! This post marks the beginning of our journey as a company. As we progress, we will be posting announcements, updates, as well as helpful content about our products on this page. We hope that you find the content useful, or at least entertaining.
AccentuSoft is the developer of LinkScope, the open source intelligence gathering and processing software. We aim to assist investigators with collecting data from different sources, discovering connections between them, and presenting the findings in a clear and straightforward manner.
The LinkScope Client is open source, and can be found on the company’s Github repository. We are committed to supporting the open source community, as what we’ve built rests on the shoulders of the projects of others. As such, the client will forever remain free and open source. For customers who wish for premium support, we offer a paid subscription. We also offer hosted LinkScope Server instances, which provide additional capabilities to the investigators that require features such as collaboration and document processing. Documentation for the software can be found at the company’s Github repository, and we will also be releasing tutorials and examples of using LinkScope on this blog.
We always welcome suggestions, feedback and especially criticism, as we believe it helps us deliver better products and services.
We hope to be able to assist organizations in their day-to-day operations, and make people’s jobs at least a little bit easier.